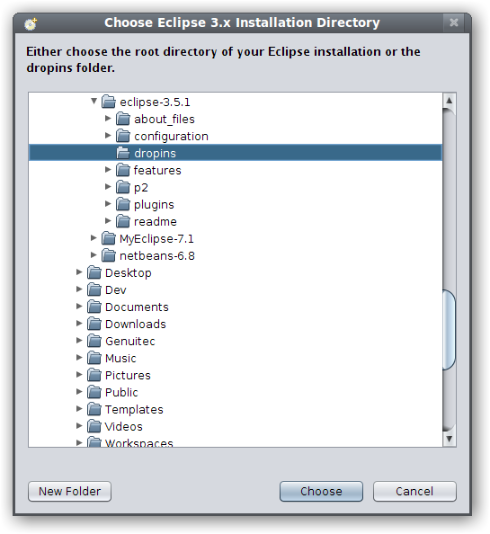
The provided setup wizard support installation into an existing dropins folder. All you have to do is to specify the dropins folder as the installation target.
In order to install the plug-in follow the steps as described below:
Make sure Eclipse is not currently running
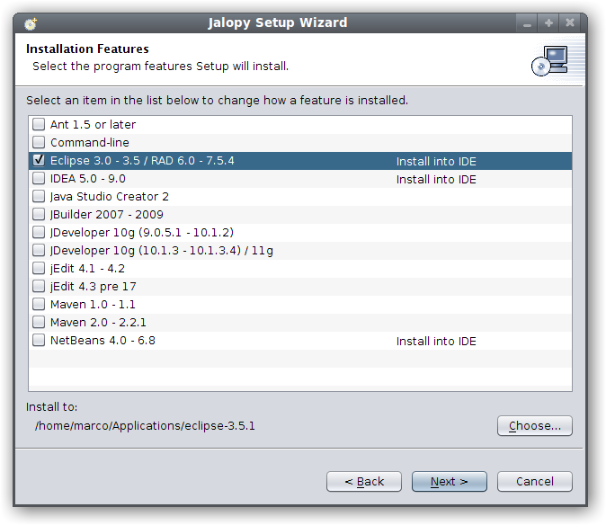
Invoke the setup wizard as described in the user’s guide. Proceed to the License page, accept the terms and press the Next button to display the Installation Features page
Select the Eclipse 3.0 entry and make sure the installation target is set to "Install into IDE"

Press the Choose... button to invoke the file chooser and the select the Eclipse dropins folder as the target directory

The dropins folder is usually located below the Eclipse application directory. But this might not be the case for all applications build on the Eclipse platform. Please ask your IDE vendor for help if you don’t know where to find the dropins folder
Proceed with the installation as described in the user’s guide. The installer will copy the necessary files into the dropins folder where the plug-in will be automatically picked up by Eclipse