The provided setup wizard supports the creation of Eclipse update sites. In order to create an update site follow these steps:
Invoke the setup wizard as described in the user’s guide. Proceed to the License page, accept the terms and press the Next button to display the Installation Features page
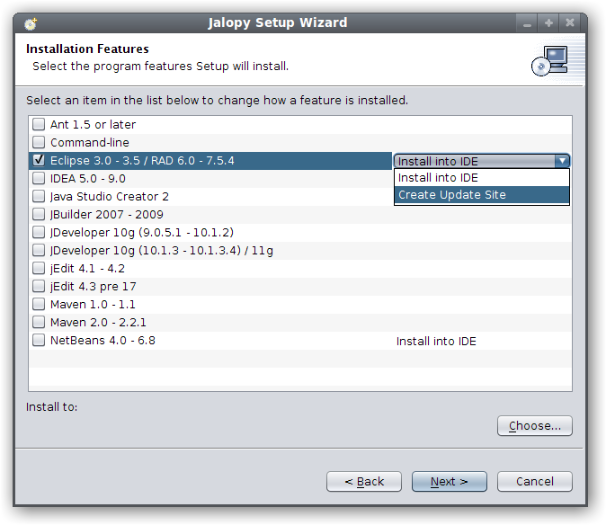
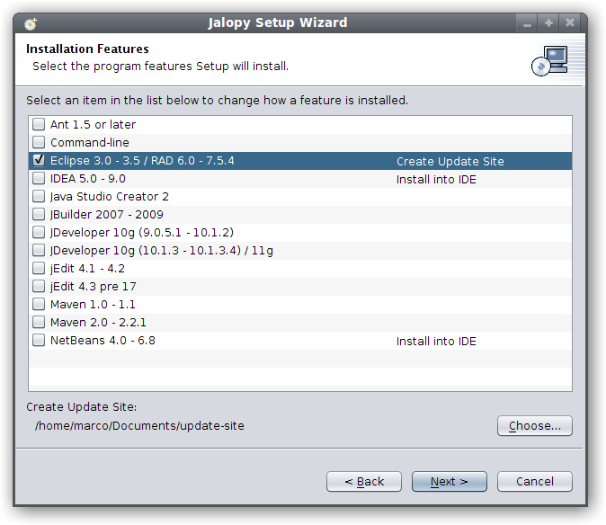
Select the Eclipse 3.0-3.6 entry and make sure the installation target is set to "Create Update Site". If there should be a different target selected, click on the target to display a pop-up menu that lets you switch the install target

Press the Choose... button to invoke the directory chooser and select the target location where the installer should generate the update site files

Proceed with the installation as described in the user’s guide (you can simply skip through the pages, all required data for the update site creation has already been set on the Features page). Eventually, the installer will create several update sites in different directories matching the different Eclipse versions below the specified target directory. You can either directly add a directory as a local update site to Eclipse as described in the How do I install from a local Eclipse update site? How-To. Or place the folder contents on a web server to serve as a shared update site for your team